
9 Steps to Start Sending Personalized Mass Emails
Email marketing is alive and well—and it can help you grow your business at a lower cost than many other marketing or sales tactics. That is if you have the right mass email tools and strategy to launch the type of campaign that will generate your desired results. You are probably wondering how exactly you should develop a strategy and find the right tools—which is why you’ve landed on this article!
Though sending bulk emails may seem like an easy way to engage your audience, there are a lot of steps that go into formulating an email campaign before you’re ready to hit the send button. If you’re just getting started sending cold emails or marketing emails you’ll likely need a few pointers to fine-tune your latest campaign. Today, we’re discovering the 9 most important steps you need to take to launch a successful email campaign and start seeing real results. Before we get too ahead of ourselves, let’s define mass emails.
What are Mass Emails?
Mass emails, otherwise known as bulk emails, are sent to large groups of people at once.

Mass emails are a part of our daily lives.
When we talk about mass emails, we are referring to the act of sending emails to many recipients—often hundreds or even thousands, depending on the size of your address list. These messages are sent with a direct purpose and usually fall into the categories of either marketing emails or sales emails. Marketing emails are sent to engage an already existing audience that has opted in to receive your messages. Sales messages most often take the shape of cold emails, meaning they are sent to addresses that have been prospected based on their job, where they live, or some other defining factor. The kind of emails you’ll be sending is dependent on your industry as some fields will utilize one type of mass email over the other.
If you have an email address—as most people do—then it is highly likely that you’ve encountered mass emails before. If you’ve signed up for a job board and receive email notifications, those are mass emails. If you’ve made a purchase from an online store and received a coupon or some other form of incentive, that is also a mass email. You might have noticed that even though these messages are being sent to many addresses at once, they are still somehow personalized with your name. Personalization is one of the key tactics that mass emailers use to grab their audience’s attention. That’s why we’re going to be looking at some strategies to help you create thoughtful, personalized mass emails that your audience will want to open. Let’s get started!
Steps to Sending Personalized Mass Emails
Step 1: Choosing Your Mass Email Tool
Before you start sending emails or even strategizing, you need to choose the right mass email tool to help you get started.
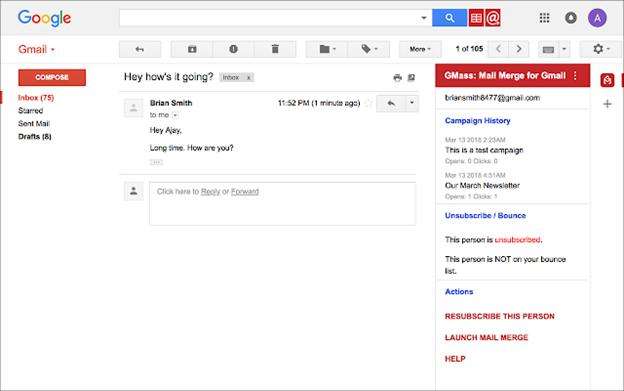
An example of a mass email plugin interface. Image courtesy of GMass.
No matter how small your business, your Gmail or Outlook account is not enough to start sending mass emails. Without the key automation features of a mass email tool, you’ll end up wasting your time. Luckily, there are a lot of options available that you can use to get your campaign started.
The best mass email plugin for your needs will differ depending on your industry, the intent of your campaign, your skillset, and your budget. There are a lot of mass email tools that offer free trials or have free options that you can try before you buy. Most premium plans for these kinds of tools range anywhere from $10/month up to $100+/month. However, the higher prices plans are more well-suited for large companies that will be sending thousands of emails per day.
If you aren’t exactly a world-class graphic designer, then you’ll want to focus on the email builder features as part of your selection process. Your mass email tool should not only help you send emails, but it should also help you craft the messages. So, try out a few different plugins and see which one feels the most intuitive for you on the design front.
Though each mass email tool will be slightly different, they all have the same set of key features that make them such important tools for sending mass emails. Features to look out for include:
- A/B Testing
- Comprehensive reporting
- Email builder tool
- Personalization & segmentation options
- Email flows
Once you’ve weighed your options and selected your mass email tool, it’s time to move on to the next step—your address list.
Step 2: Your Address List
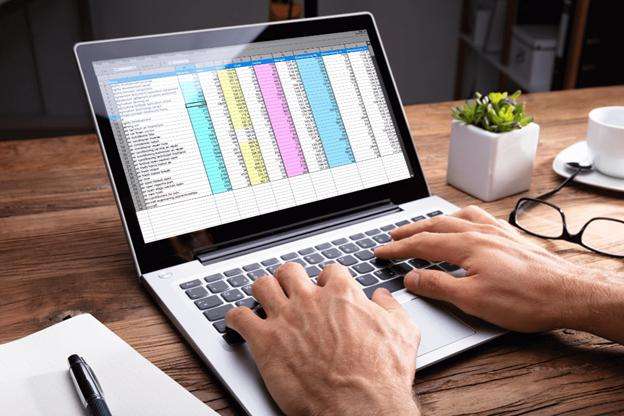
Easily import, manage, and update your address list using your mass email tool.
Remember to update your address list frequently.
Your address list is what connects you to your target audience for your mass email campaigns. If you don’t yet have an address list, now is the time to get started. An address list can be built in one of two ways. For marketing purposes, you’ll start collecting addresses by encouraging your site visitors to share their email addresses and opt into your messages. Collecting addresses this way is usually done with a website popup or an opt-in that comes along with an eCommerce purchase.
The second way to start building your address list is through lead generation or prospecting. Prospecting involves searching for publicly available addresses and adding them to your list based on your target audience. For example, many people will have their email addresses publicly available on their Facebook or LinkedIn pages. By searching for specific audiences you can build out a robust address list for your upcoming campaign.
If you already have your address list ready to go, then your next step is to import your addresses using your mass email tool. This process is sometimes called a mail merge and can be performed using either Excel or Sheets, depending on your preference. Once your address list is imported, it’s time to get started strategizing and building your email.
Step 3: Rich-Text vs. HTML
We’re discussing the two main kinds of messages you can send with your mass email tool.

Your email intent will determine whether you choose rich-text or HTML.
Before we can get into the many different types of mass emails you want to send, we should talk about the two big groups that these messages fall into. When you send mass emails you are either sending rich-text or HTML messages.
Rich-text emails depend heavily on your written copy and don’t allow for many design elements. This method is more often used for sales emails, as rich-text emails appear as though they were sent from an individual, rather than a business.
The second type of email relies heavily on HTML as opposed to copy. These messages include flashier design elements, including clickable calls to action, and a heavy focus on company branding. These types of emails are better suited for marketing as they do a better job of communicating a brand and desired action as opposed to rich-text emails. Once again, your decision at this point will depend on your industry and your strategy for your next campaign. Now that we’ve discussed rich-text vs. HTML, it’s time to select your design template and start crafting your email.
Step 4: Start Designing Your Message
Using your mass email tool, you can create compelling designs from customizable templates.

Email marketers have to make a lot of important design decisions.
Now that you’ve got your basic strategy outlined, it is time to start designing your message. Your message design will rely on the type of content you want to show your audience for this upcoming campaign. You could be sending a message welcoming your new subscribers, updating them with a newsletter, introducing yourself and your company, or announcing a sale. Each of these messages should look different since they are communicating different messages visually and through the email copy. Your mass email tool will have several templates you can use to get started. These templates are completely customizable, so you will be able to insert any branding material, logos, or colors you need to make the message your own. Most mass email tools will have a drag and drop feature that you can use to easily insert many otherwise complicated design elements to make your email stand out from the others. Using your mass email plugin, you can use any of the following design elements:
- CTA buttons
- HTML code
- Images
- Social media icons
- Countdown timer
- Videos
Once you have a draft of your email ready to go, you’re ready to move on to the next step!
Step 5: Personalization
Using your mass email tool you can automatically personalize bulk emails that will grab your audience’s attention.

Personalization is proven to boost your open rate.
The first step to getting your campaign started is to name your campaign in your mass email tool. Once your campaign has a name, it’s time to start designating which parts of your message will be personalized. As you write your subject line and email copy, it is easy to designate where you want your personalized information to appear. For example, you could start with something as simple as “Hello [First Name].” How you designate personalization may differ depending on the mass email plugin you choose, but you can rest assured all tools can easily personalize your messages. Depending on the amount of information that you collected for your address list, you can personalize parts of your message other than a first and last name. You can write in personalization for location, hometown, job title, and any other collected information that you think is important to your audience.
Step 6: Make Sure Your Email is Optimized for Mobile
If your messages don’t translate to mobile devices, your campaign could be in trouble.

Mobile design is just as important as desktop design.
These days, people take in more content on their mobile devices than they do anywhere else. That’s right—when you send your mass emails, the majority of your audience will be viewing your message on mobile. If you neglect to check how your message appears on mobile, there is a much higher chance there will be underlying issues with your message. If your message doesn’t load properly or is riddled with errors, your recipients will likely report the message as spam. As all good email marketers know, having your messages reported as spam loses you an address and hurts your email sender reputation. If many people are reporting your message as spam, you’ll eventually run into deliverability problems as your address will be flagged by the server as untrustworthy.
To make sure that your messages are appearing correctly on each device, send several test emails to yourself or to other members of your team to ensure that all of your elements appear in the right place and your copy is free of mistakes.
Double and triple-checking how your messages look once they’re delivered is one of the most important steps in this entire process. By taking a few extra minutes to check your work, you can avoid the embarrassment of sending out an email with a glaring error.
Step 7: Segment Your Address List
Once you’ve tested your messages, it’s time to segment your audience using your mass email tool.

Segmentation leads to better engagement reports.
When it comes to your mass email strategy, segmentation is key. Segmentation refers to the practice of splitting your address list into groups so you can more precisely target different audiences in the same campaign. For example, if you run an eCommerce site, you might split your audience into those who have purchased in the last 6 months vs. those who have not purchased in that time frame. By segmenting your audience this way, you can make alterations to your message and personalization to appeal to both audiences. In this case, you might try experimenting with some of the message copy, instead of using the headline—“Read about the latest from our company”—you might try something like—“We’ve missed you!”— for your recipients who have not purchased in the last 6 months. It is often these small details that you can pinpoint using segmentation that make or break email campaigns. After all, if your message isn’t relevant to a certain demographic within your address list, your emails are much more likely to be reported as spam.
Step 8: Schedule Your Email Flow
By scheduling your emails using your mass email tool, you can make sure your messages are being sent at the right time
Your mass email service can automatically reach out to targeted audiences
Now that you have your message double-checked and your audience segmented, the last step before you hit send is scheduling your messages. Scheduling your messages is important for two reasons—the first reason is that it allows you to begin your email flow. An email flow is a set of instructions that you can designate in your mass email tool to send certain messages at certain times. For example, you can use email flows to run a re-engagement campaign. If a recipient hasn’t interacted with your messages for a few months, you can instruct your mass email tool to automatically send them a message to hopefully get them to interact. These email flows help you keep your audience engaged automatically.
The second reason you should schedule your messages is that there are certain times of the week that work best for sending mass emails. The specific times will depend on your audience, so you should do your research to discover which times are best for different segments of your address list.
Step 9: You’re Ready to Hit Send!
For the final step in sending your personalized emails, we’re taking a look at how you can read and interpret metrics from your mass email tool.

Congratulations, you’ve created your first mass email campaign.
After you’ve completed our first 8 steps, you’re all ready to launch your campaign! See, it wasn’t so difficult—especially with the help of your mass email tool. Hitting send on your campaign is an incredible accomplishment, but your work is never quite done when it comes to email marketing. Once your emails have been sent, you can move on to reporting. Your mass email plugin can track your audience behavior and provide insights you can use moving forward with future campaigns. Using your mass email plugin, you can pull the following email marketing metrics and see how your campaign went over with your audience:
- Total Emails Sent
- Open Rate
- Click Rate
- Click-To-Open Rate
- Delivery Rate
- Bounce Rates
- Unsubscribe Rate
Using these metrics, you can see what parts of your message are and aren’t landing with your recipients. From there, you can get started brainstorming for your next campaign!
We hope that you learned a lot of valuable information from our 9 steps to sending personalized mass emails. While there isn’t one straightforward strategy you can count on, there are a lot of different ways that you can use your mass email tools to maximize your reach. If your first campaign didn’t go the way you planned, that’s OK! You can keep learning and trying different strategies until you can consistently nail subsequent mass email campaigns.